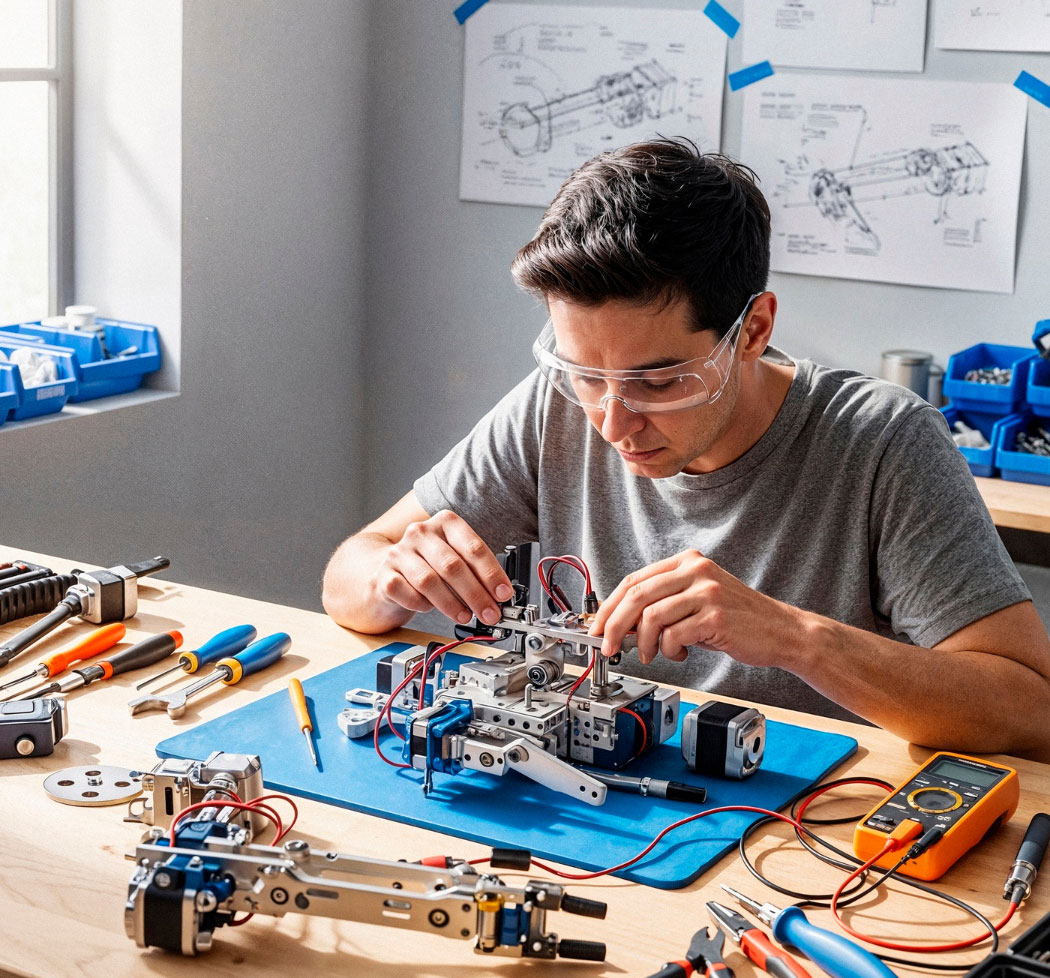
PictoBlox-style Blocks + Step-by-step Classroom Guide — 10 Projects
Protomech Robotics is India’s premier provider of school robotics workshops, STEM kits, coding & programming courses, Arduino and PictoBlox projects. We design hands-on robotics, AI, and STEM learning programs that empower students, parents, and schools across India. Join hundreds of schools that trust Protomech Robotics for practical robotics education, technology skill development, innovation labs, and interactive STEM training. Our World of Robots program brings fun, safe, and educational robotics experiences for grades 4–10 students.
Blocks above are visual helpers — each project below includes the same visualized blocks followed by step-by-step instructions, wiring, expected outcome, tips and classroom notes.
1) Blinking LED — Introduce digital output 10–15 min • Beginner
Hardware & Wiring
- LED + 220Ω resistor
- Connect LED anode (long) → Arduino Pin 13
- Connect LED cathode → GND through 220Ω resistor
Step-by-step (teacher-student)
- Open PictoBlox → choose Board → Arduino Uno and Upload Mode.
- Drag When Arduino starts up into the workspace.
- Drag a Forever loop and attach it.
- Inside Forever, add Digital write pin 13 HIGH then Wait 1 s.
- Add Digital write pin 13 LOW and another Wait 1 s.
- Click Upload. Observe LED blink every second.
Expected outcome
On upload, the LED toggles ON and OFF once every second. If using Uno, the onboard LED on pin 13 will also blink.
Troubleshooting
- If nothing blinks – confirm ground and pin connection, check resistor orientation, check upload success.
- If LED is dim – verify resistor value and board 5V supply.
Teacher tips & extensions
- Ask students to change delay to 0.2s and observe faster blinking.
- Use a potentiometer (analog read) to control blink speed — great next-step activity.
2) Traffic Light — Multiple LEDs with timing 20–30 min • Beginner+
Hardware & Wiring
- Red LED → Pin 8; Yellow → Pin 9; Green → Pin 10 (each with 220Ω to GND)
Steps
- Place the hat + forever block.
- Sequence pins 8→9→10 with waits as shown.
- Upload and verify the cycle.
Outcome
LEDs cycle like a traffic light. Useful to introduce timing and sequencing logic.
Teacher tips
- Add a pedestrian button (digital input) to pause the sequence and allow pedestrian crossing.
- Challenge: implement blinking yellow for late-night mode.
3) Obstacle Detector — Ultrasonic + Buzzer 25–35 min • Beginner+
dist < 20Hardware & Wiring
- HC-SR04: VCC→5V, GND→GND, TRIG→Pin 2, ECHO→Pin 3
- Buzzer + → Pin 8, − → GND (active buzzer)
Step-by-step
- Wire sensor and buzzer as above.
- In PictoBlox use the ultrasonic ‘measure’ block and store to
dist. - Use an if/else: if
dist < 20then buzz else stop. - Upload and test with various objects. Calibrate threshold as needed.
Expected outcome
Buzzer sounds when an object is closer than ~20 cm. Good demo of sensors → actions.
Troubleshoot & tips
- Unstable readings? Average 3 consecutive measurements (read, wait 20 ms, read, compute mean).
- Use object surfaces (cardboard, fabric) to see echo differences — discuss limitations.
- Extension: instead of buzzer, command motors to stop or reverse the robot.
4) Line Follower (Basic) — IR sensor navigation 40–60 min • Intermediate
Hardware & Wiring
- Two IR reflectance sensors: Left → A0, Right → A1
- Motor driver (L298/L293) + two DC motors; driver IN pins → Arduino digital pins (example: L: 9/10, R: 11/12)
Steps
- Build a simple 2-wheel chassis and mount IR sensors near the ground about 1–2 cm above the floor.
- Calibrate sensors: print ‘left’ & ‘right’ values to serial while moving over white and black surfaces; pick a threshold (e.g., 400).
- Create logic: both sensors see white → go straight; left sees black → pivot left/right as needed; implement small delays to avoid jitter.
- Test on a short track and tune motor speeds for smooth turning.
Expected outcome
Robot follows a single black line on white surface; students learn sensor calibration and basic control flows.
Teacher tips
- Create different track shapes — loops, S-curves — for progressive challenges.
- Advanced: implement simple PID to improve tracking.
5) Smart Street Light — LDR-controlled LED 20–30 min • Beginner+
light < 300Hardware & Wiring
- LDR in voltage divider to A0 (LDR + resistor); LED on Pin 12 + resistor to GND
Steps
- Wire LDR as a voltage divider: 5V → LDR → A0 → fixed resistor → GND (or vice versa).
- Read analog value and choose threshold by printing values in various lighting.
- Switch LED ON when reading falls below threshold (meaning dark) or vice versa depending on wiring.
Outcome
LED turns ON in low light (streetlight behavior). Good for teaching analog sensors and mapping.
Teacher tips
- Have students log values at day & night conditions to pick threshold.
- Extension: use
map()to dim LED with PWM for gradual brightness.
6) Fan Control — DC motor with switch 25–40 min • Beginner+
Hardware & Wiring
- DC motor/fan powered via MOSFET or driver (don’t drive from Arduino pin)
- Switch between 5V and Arduino pin 2 (use pull-down/up as required)
Steps
- Wire MOSFET gate → Arduino pin 9 via 220Ω; motor between +V and MOSFET drain; MOSFET source → GND (common GND).
- Use digital read of switch to decide PWM output (full speed or stop) or use potentiometer for variable speed.
- Upload and test with a separate motor power supply.
Outcome
Pressing the switch turns the fan on; releasing turns it off. Optionally variable speed control with pot.
Safety & tips
- Always use a diode or driver to protect from back-EMF if not using an H-bridge.
- Use separate battery pack for motor; tie grounds together.
7) Smart Doorbell — Button + Buzzer 15–20 min • Beginner
Hardware & Wiring
- Push button between 5V and digital pin 2; use 10k pull-down to GND (or use internal pull-up)
- Buzzer + → Pin 8, − → GND
Steps
- Connect button with pull-down resistor or set pinMode to INPUT_PULLUP and wire differently.
- Use if-block to detect press and toggle buzzer for 0.5s or play a melody (passive buzzer by toggling frequency).
- Upload and test; debounce if multiple triggers occur too fast.
Teacher tips
- Explain pull-up vs pull-down logic: when button is pressed the reading changes state.
- Extension: flash an LED or send serial/log entry when button pressed.
8) Temperature Monitor — LM35 (analog) with alert 30–40 min • Beginner+
Hardware & Wiring
- LM35: VCC→5V, GND→GND, Vout→A1
- Alert → buzzer or LED on Pin 8
Steps
- Read analog value. Convert to voltage:
V = raw * 5 / 1023. LM35 outputs 10mV/°C →tempC = V * 100. - Use threshold to trigger buzzer or LED if temperature exceeds safe limit (e.g., 30°C).
- Optionally print temp to serial for debugging and student learning.
Outcome
Students learn how analog-to-voltage conversion maps to real-world units (°C).
Teacher tip
- Use simple math blocks to demonstrate conversion; use serial monitor to show readings.
- Extension: log readings to an SD card or display on a small LCD (16×2).
9) Servo Gate — Servo motor control 20–30 min • Beginner+
Hardware & Wiring
- Servo: Signal → Pin 6, Vcc → 5V (or external 5V), GND → GND (shared)
Steps
- Attach servo and ensure a stable 5V supply (several servos → external supply).
- Use servo write blocks to set angles and introduce delays to observe movement.
- Optional: control servo angle with a potentiometer or trigger it using ultrasonic sensor.
Outcome
Servo moves to specified angles — students learn PWM-based positioning vs DC motor continuous rotation.
Teacher tips
- Avoid powering a torque-heavy servo from Arduino 5V pin; use a separate regulated 5V and common ground.
- Extension: Make the gate open when HC-SR04 detects a person (trigger distance).
10) Mini Robot Car — 2-wheel drive with forward/reverse 60–90 min • Intermediate
Hardware & Wiring
- Chassis, 2 × DC motors, motor driver (L293D / L298N), battery pack for motors
- Example pin mapping: Left IN1=9, IN2=10; Right IN1=11, IN2=12; enable pins to PWM if variable speed is required
Steps
- Wire motors to driver outputs; driver IN pins to Arduino digital pins per mapping; driver Vmotor to battery +, driver GND to battery GND & Arduino GND.
- Create forward, stop, reverse sub-blocks with correct IN pin states (HIGH/LOW) and waits.
- Upload and test in a clear area. Tune wait durations and consider reducing speed if chassis slips.
Expected outcome
Car moves forward, stops, reverses and can be given turns by running one motor only — basic autonomy or remote control.
Extensions & classroom ideas
- Add HC-SR04 obstacle avoidance: when
dist < 20then stop & turn. - Remote control options: HC-05 Bluetooth or RF modules — create a mobile app or use PictoBlox joystick.
- Assessment: groups present a timed obstacle course completion.
Classroom Flow, Assessment & Next Steps
- Session order: 1) LED Blink, Traffic Light, Buzzer – outputs & timing; 2) Sensors: Ultrasonic, LDR, IR; 3) Actuators & robots: servo, motors, mini car.
- Assessment ideas: wiring correctness (30%), program logic (40%), demo (30%).
- Time planning: Mix of 45–90 minute sessions depending on project difficulty.
- Teacher resources available: printable wiring sheets, PictoBlox .sb3 example files, and high-res diagrams (I can prepare these on request).
Protomech — PictoBlox + Arduino: Faculty Guide (10 Projects)
Complete classroom-ready guide for ICT Kerala “World of Robots”. Each project includes components, step-by-step PictoBlox instructions (visual block style), expected outcome and teacher tips.
1) Blinking LED — Introduce digital output 10–15 min • Beginner
Components Required
- Arduino Uno or Nano
- 1 × LED (any color)
- 1 × 220Ω resistor
- Breadboard & jumper wires
- USB cable (for upload)
Step-by-step Instructions
- Wire: LED anode (long) → Pin 13; LED cathode (short) → 220Ω → GND.
- Open PictoBlox. Select Board → Arduino Uno. Switch to Upload Mode.
- Drag the “When Arduino starts up” hat block into the workspace.
- Attach a Forever loop and inside add: Digital write pin 13 HIGH → Wait 1s → Digital write pin 13 LOW → Wait 1s.
- Click Upload. Observe LED blink ON/OFF every second.
Expected Outcome
LED toggles ON for 1 second and OFF for 1 second repeatedly. If using an Uno, built-in LED on pin 13 will also blink.
Tips & Troubleshooting
- If LED doesn’t blink — check GND and pin connection; verify upload success in PictoBlox.
- Change wait to 0.2s to demonstrate faster blinking or 2s for slower blink.
- Extension: Control blink speed via potentiometer (analog read → map → wait).
2) Traffic Light — Multiple LEDs with timing 20–30 min • Beginner+
Components Required
- Arduino
- 3 × LEDs (Red, Yellow, Green)
- 3 × 220Ω resistors
- Breadboard & jumpers
Step-by-step Instructions
- Wire: Red → Pin 8 → 220Ω → GND; Yellow → Pin 9 → 220Ω → GND; Green → Pin 10 → 220Ω → GND.
- In PictoBlox create the sequence shown in blocks and upload.
- Observe LEDs cycle like a traffic signal.
Expected Outcome
LEDs will cycle Red → Yellow → Green with respective delays. Great for teaching sequencing and timing logic.
Tips
- Add a pedestrian button (digital input) to interrupt and allow pedestrian crossing.
- Challenge students to implement blinking yellow for “caution mode”.
Pin8 → Red ; Pin9 → Yellow ; Pin10 → Green (each via 220Ω to GND).
3) Obstacle Detector — Ultrasonic + Buzzer 25–35 min • Beginner+
Components Required
- Arduino
- HC-SR04 ultrasonic sensor
- Active buzzer
- Jumper wires & breadboard
Step-by-step Instructions
- Wiring: HC-SR04 VCC→5V, GND→GND, TRIG→Pin2, ECHO→Pin3. Buzzer + → Pin8, − → GND.
- In PictoBlox use the ultrasonic measure block to store distance in variable
dist. - Use an if/else: if
dist < 20then set pin8 HIGH else LOW. Upload and test. - To stabilize readings, average 3 measurements before decision.
Expected Outcome
Buzzer sounds when an object is closer than ~20 cm. Demonstrates sensor → action flow.
Tips
- Discuss sensor limitations (soft/absorbent surfaces reflect differently).
- Extension: stop motors or reverse robot instead of buzzer.
4) Line Follower (Basic) — IR sensor navigation 40–60 min • Intermediate
Components Required
- Arduino
- 2 × IR reflectance sensors (or digital IR pair)
- 2 × DC motors + motor driver (L293D / L298N)
- Chassis/wheels & battery pack for motors
Step-by-step Instructions
- Mount IR sensors 1–2 cm above the ground, front of chassis.
- Calibrate: read analog values on white and black surfaces and pick a threshold (e.g., 400).
- Implement logic: both white → forward; left black → pivot left/right per mapping; tune motor speeds.
- Test on printed black line tracks with different curves.
Expected Outcome
Robot follows a black line on white background. Good for teaching sensor calibration and conditional logic.
Tips
- Provide sample tracks (straight, curves, S-turn) for progressive assessment.
- Advanced groups: implement PID controller for smoother following.
5) Smart Street Light — LDR-controlled LED 20–30 min • Beginner+
Components Required
- Arduino
- LDR (photoresistor) + 10k fixed resistor (voltage divider)
- LED + 220Ω resistor
- Breadboard & wires
Step-by-step Instructions
- Wire LDR as voltage divider to A0 (5V → LDR → A0 → 10k → GND).
- Read analog A0 and observe values in different lighting; choose threshold.
- Switch LED on Pin12 when reading falls below threshold (dark) or invert logic depending on wiring.
Expected Outcome
LED turns ON when ambient light is low (streetlight behavior). Useful to teach analog inputs and mapping.
Tips
- Ask students to record analog values in classroom & near window to choose threshold.
- Extension: use PWM to dim LED gradually based on light level (map analog value to PWM).
6) Fan Control — DC motor with switch 25–40 min • Beginner+
Components Required
- Arduino
- DC motor / small fan
- N-channel MOSFET (or motor driver) and diode
- Push switch or toggle
- Separate motor power supply (battery pack)
Step-by-step Instructions
- Wire switch between 5V and Arduino pin 2 with pull-down or use INPUT_PULLUP with reversed wiring.
- Connect MOSFET gate → Arduino PWM pin 9 (via 220Ω); motor to motor supply through MOSFET drain; common GND.
- In PictoBlox read digital pin 2; if HIGH set PWM 9 to 255 else 0. Upload and test with motor battery connected.
Expected Outcome
Switch toggles fan ON/OFF. With pot instead of switch you can make variable speed control.
Tips & Safety
- Never drive motor directly from Arduino pin. Use MOSFET/driver and separate supply for motor power.
- Include diode or use motor driver to protect from back-EMF unless motor driver has protection.
7) Smart Doorbell — Button + Buzzer 15–20 min • Beginner
Components Required
- Arduino
- Push button
- 10k resistor (for pull-down) or use internal pull-up
- Active or passive buzzer
Step-by-step Instructions
- Wire button between 5V and digital pin 2; add 10k pull-down resistor to GND (or use INPUT_PULLUP and wire to GND).
- Connect buzzer + to Pin 8 and − to GND.
- In PictoBlox if pin2 reads HIGH then buzz for 0.5s. Upload and test; add debounce if needed.
Expected Outcome
Pressing the button briefly sounds buzzer. Can be extended to play melody (passive buzzer) or flash LED.
Tips
- Explain internal pull-up concept using inverted logic: pressed=LOW.
- Extension: log timestamp on press or send notification via Bluetooth module.
8) Temperature Monitor — LM35 with alert 30–40 min • Beginner+
Components Required
- Arduino
- LM35 temperature sensor (or similar analog TMP)
- Buzzer or LED for alert
- Jumper wires & breadboard
Step-by-step Instructions
- Wire LM35: VCC→5V, GND→GND, Vout→A1.
- In PictoBlox read analog A1 into
raw. Convert to voltage:V = raw * 5 / 1023, thentempC = V * 100. - If
tempC > thresholdthen drive buzzer or LED (pin8) ON; else OFF. Upload and test.
Expected Outcome
When measured temperature exceeds the set threshold (e.g., 30°C) the alert triggers. Useful to teach unit conversion and analog mapping.
Tips
- Use serial prints to display raw and computed temperature values during calibration.
- Extension: display temp on 16×2 LCD or log to an SD card for data analysis.
9) Servo Gate — Servo motor control 20–30 min • Beginner+
Components Required
- Arduino
- Servo motor (SG90 or similar)
- External 5V supply recommended if torque/load > small
- Jumper wires & mounting hardware
Step-by-step Instructions
- Connect servo signal → Pin6; power → 5V (external supply recommended if needed); share GND.
- In PictoBlox use servo write blocks to set angles and delays to observe motion.
- Optional: trigger servo with ultrasonic (open gate when person detected).
Expected Outcome
Servo moves to specified positions (0°, 90°, 180°). Great to demonstrate positional control vs continuous motors.
Tips
- Always common-ground external servo supply with Arduino ground.
- Use brackets/supports to mount servo to gate mechanism; test movement without load first.
10) Mini Robot Car — 2-wheel drive with forward/reverse 60–90 min • Intermediate
Components Required
- Arduino
- 2 × DC motors with wheels
- Motor driver (L293D / L298N or similar)
- Chassis & battery pack (motor supply)
- Ultrasonic sensor optional for obstacle avoidance
Step-by-step Instructions
- Wire motors to driver outputs; driver IN pins to Arduino (example mapping: L IN1=9 IN2=10 ; R IN1=11 IN2=12).
- Driver Vmotor → battery pack positive; driver GND → battery GND and Arduino GND (common ground).
- In PictoBlox create forward, stop, reverse sequences using digital writes and waits. Upload and test on flat surface.
- Optional: add HC-SR04 to avoid obstacles (measure dist and take avoidance action).
Expected Outcome
Robot drives forward for set time, stops, and reverses. With sensors it can avoid obstacles; with remote modules it can be tele-operated.
Extensions & Classroom Ideas
- Remote control using Bluetooth (HC-05) or RC modules (hands-on mobile app control).
- Group challenge: design obstacle course and time completion; award improvements in wiring, code, and demonstration.
Classroom Flow, Assessment & Resources
- Session plan:
- Session 1 (45–60 min): Blink LED, Traffic Light, Doorbell — outputs & basic inputs.
- Session 2 (60–90 min): Sensors — Ultrasonic, LDR, Temperature, calibration & logging.
- Session 3 (90–120 min): Actuators & robotics — Motor control, Servo gate, Mini robot car (group project).
- Assessment ideas: wiring correctness (30%), program logic & blocks (40%), live demo/presentation (30%).
- Resources available: printable wiring sheets, PictoBlox .sb3 sample projects, high-res diagrams — ask and I will prepare them.